
What to do if the gear reducer leaks oil in winter
Release Time:
2025-07-28
The main function of a reducer is to simultaneously reduce the output torque. Multiply the torque output ratio by the motor output and reduction ratio, but be careful not to exceed the rated torque of the reducer.
What to do if the gear reducer leaks oil in winter
The main function of a reducer is to simultaneously reduce the output torque. Multiply the torque output ratio by the motor output and reduction ratio, but be careful not to exceed the rated torque of the reducer.
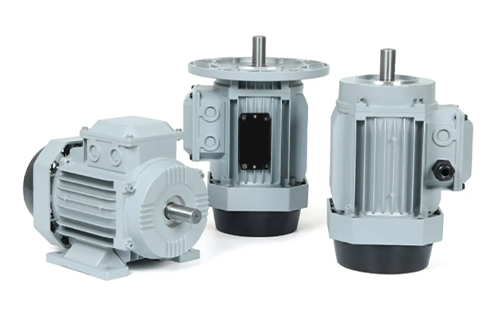
Oil leakage in gear reducers during winter is indeed a headache, as low temperatures can exacerbate the already existing sealing issues. Don't worry, I will analyze the reasons and share solutions with you:
The main reasons for the aggravation of oil leakage in winter are:
Seal hardening/shrinkage: Low temperatures can cause sealing materials such as rubber or polyurethane (such as O-rings, oil seals, gaskets) to harden, lose elasticity, and even shrink. This results in them being unable to tightly adhere to the sealing surface, leaving gaps.
Increased viscosity of lubricating oil: At low temperatures, the viscosity of gear oil increases (thickens) and its fluidity deteriorates. This increases the pressure difference at the sealing interface (internal oil pressure relative to external atmospheric pressure), making it easier to squeeze out from tiny gaps.
Differences in thermal expansion and contraction: The thermal expansion coefficients of the reducer housing (usually metal) and the sealing components (rubber/plastic) are different. At low temperatures, the metal shrinkage rate is usually lower than that of the sealing material, which may lead to a decrease in sealing contact pressure.
Ice formation: If there is moisture inside the reducer or if the breathing apparatus (vent cap) freezes and blocks, the internal pressure may increase due to changes in oil temperature or gas production, forcing oil to seep out from weak seals.
The original sealing problem is magnified: In summer, there may be only slight oil leakage or no leakage, but under the low temperature and high viscosity oil in winter, small problems will become obvious leaks.
Processing steps and solutions:
Safety:
Stop the machine! Before dealing with oil leakage issues, it is necessary to cut off the power source of the reducer and ensure that the equipment is in a safe locked state.
Wait for the reducer to cool down (if it has just been run) to avoid burns.
Cleaning and positioning:
Thoroughly clean the reducer housing, especially the oil leakage area and surrounding areas. Use a cloth or industrial cleaner to remove oil, dust, and impurities. The purpose is to accurately locate the leakage point.
Key: Carefully observe the source and direction of the oil stain, and accurately determine the specific location of the leak. Common leakage points:
Input/output shaft oil seal (common)
Shell joint surface (upper and lower box connection surface, end cover connection surface)
Observation window/oil mirror
Oil drain plug/oil fill plug
Respirator (breathing cap) interface or itself
Sensor or accessory installation interface
Shell cracks (rare, but may be induced by low temperatures)
Handling of different leakage points:
A. Oil leakage of shaft seal (input/output shaft oil seal):
Replacing the oil seal: This is the fundamental solution. Choose oil seals with excellent low-temperature resistance (materials such as fluororubber or silicone rubber have better performance at low temperatures). Ensure that the new oil seal specifications (inner diameter, outer diameter, thickness) are consistent with the original.
Check the shaft neck: After removing the old oil seal, carefully inspect the part where the shaft contacts the oil seal lip. Are there any wear, scratches, grooves, or rust? Slight wear can be carefully smoothed with fine sandpaper (very fine); Severe wear and tear requires repair or replacement of the shaft.
Correct installation: Installing a new oil seal is a technical task! Ensure:
The installation direction is correct (usually with the side of the spring facing towards the inside of the oil).
Proper installation tools or methods should be used to avoid deformation or tilting due to impact.
Apply clean lubricating oil to the shaft end and oil seal lip.
The oil seal chamber is clean and free of foreign objects.
Consider using a dual lip oil seal: If the working conditions are harsh, consider using a dual lip oil seal with a dust-proof lip.
B. Oil leakage at the joint surface of the shell:
Check bolt tightening: Re tighten all connecting bolts in diagonal order and according to the manufacturer's specified torque. Bolts may also loosen at low temperatures.
Replace sealing gasket: If the original gasket is aging, crushed or damaged, it must be replaced. Choose gasket materials that are resistant to oil and low temperatures (such as asbestos rubber, metal wrapped gaskets, polytetrafluoroethylene, etc.), and the size and shape should match.
Clean sealing surface: After disassembly, thoroughly remove any old sealant or gasket residue from the joint surface to ensure that it is flat, clean, and undamaged. If necessary, use a scraper or fine sandpaper to handle it.
Use sealant (if applicable): For joint surfaces without gaskets or requiring auxiliary sealing, a layer of oil resistant and low-temperature resistant sealant (such as silicone sealant, anaerobic sealant) can be evenly applied on the clean and dry joint surface. Pay attention to selecting the appropriate adhesive type and strictly follow the instructions (such as coating thickness and curing time). Do not apply too much to avoid squeezing into the reducer and blocking the oil circuit.
C. Observation window/oil mirror oil leakage:
Replacing the sealing ring: Typically, the O-ring has aged and hardened. Replace the low-temperature resistant fluororubber or nitrile rubber O-ring.
Tighten the gland or replace the oil mirror: if the gland is loose, tighten it; If the oil mirror itself breaks, replace it.
D. Oil leakage from drain plug/oil filling plug:
Replace sealing gaskets/combination gaskets: These are usually copper gaskets, aluminum gaskets, or rubber combination gaskets. Replace with a new one and tighten according to the specified torque. Do not overtighten to prevent the screw hole from slipping.
Check the thread: If the thread is damaged, repair the screw hole.
E. Respiratory cap issue:
Check for blockage/icing: This is a common cause in winter! Remove the respirator and check if the internal filter element or channel is blocked by sludge, dust, or ice. Clean with cleaning agent and blow dry.
Replace the respirator: If it is aged, damaged, or cannot be cleaned thoroughly, replace it with a new respirator. Choose a respirator with anti condensation or heating function (if applicable).
Ensure unobstructed: After installation, ensure that the respirator is always unobstructed.
F. Other accessory interfaces leak oil:
Check the sealing of the corresponding interface (O-ring, gasket), replace it with a low-temperature resistant type, and tighten it according to regulations.
G. Shell crack:
This situation is quite serious and usually requires professional maintenance (such as welding repair) or replacement of the shell. Temporary emergency can use metal repair glue (cold solder), but this is not a long-term solution.
Considerations for lubricating oil:
Check the viscosity of the oil: Confirm whether the viscosity grade of the gear oil currently used meets the equipment manufacturer's recommendations for low temperature environments in winter. In cold regions, it may be necessary to switch to synthetic gear oils with lower viscosity (such as ISO VG 68 to VG 46, or use winter oils marked with "W") or better low-temperature flowability.
Oil level: Check if the oil level is between the upper and lower limits of the dipstick or observation window. Excessive oil level can increase internal pressure and cause oil leakage.
Preventive maintenance (to avoid leakage in the next winter):
Regular inspection of seals: Before entering winter, carefully inspect all sealing points (especially shaft seals and joint surfaces), and replace seals that are aging, hardened, or cracked in a timely manner. Do not wait until they are leaked before replacing.
Choose high-quality low-temperature resistant seals: When replacing seals, prioritize materials with excellent low-temperature resistance such as fluororubber.
Keep the respirator unobstructed: Regularly inspect, clean, or replace the respirator.
Correct installation: The installation of any seal must be carried out in a standardized manner to avoid early failure due to improper installation.
Use appropriate lubricating oil: Select or replace appropriate viscosity grade gear oil according to the manufacturer's requirements based on changes in ambient temperature.
Summarize key points:
Safe shutdown, clean and locate.
Accurately identifying the leakage point is the key to successful repair.
Take corresponding measures for different leakage points: replace low-temperature resistant seals (oil seals, O-rings, gaskets), clean/replace respirators, tighten bolts to the specified torque, clean and treat sealing surfaces (use appropriate sealant if necessary), check the status of shaft necks/threads, and evaluate the viscosity of lubricating oil.
Winter prevention is more important: check the sealing status before winter, keep the respirator unobstructed, and ensure the use of appropriate viscosity oil.
If the leakage point is complex, involves internal disassembly, or if you are unsure of how to handle it yourself (such as replacing the input shaft oil seal, which may require disassembling the coupling or end cover), it is recommended to contact professional equipment maintenance personnel or after-sales service from the reducer manufacturer to avoid greater losses caused by improper operation. I hope these suggestions can help you completely solve the oil leakage problem and ensure that the equipment can operate smoothly even in winter!
Related News